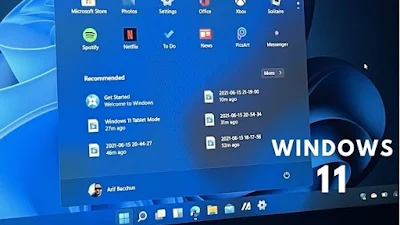
Tuesday, 10 August 2021

Avamar: VMware image backups fails Error 10056


VMware client Image backups are failing with Error 10056.

The Snapshot create task fails with one the following errors:
 

avvcbimage Warning <18652>: Too many extra snapshot files (3) were found on this Windows VMs datastore. This can cause a problem for the backup or restore.
avvcbimage Info <18678>: Extracted VMNAME-flat.vmdk base disk from the VMX file
avvcbimage Info <18678>: Extracted VMNAME_1-flat.vmdk base disk from the VMX file
avvcbimage FATAL <0000>: [IMG0002] The datastore information from VMX '[DATASTORENAME01] VMNAME/VMNAME.vmx' will not permit a restore or backup.
avvcbimage Info <9772>: Starting graceful (staged) termination, Too many pre-existing snapshots on the datastore will not permit a restore or backup. (wrap-up stage)
avvcbimage Error <0000>: [IMG0009] Create Snapshot: snapshot creation or pre/post snapshot script failed.
avvcbimage Error <0000>: [IMG0009] Create Snapshot: snapshot creation/pre-script/post-script failed.


Cause
There are hidden files, snapshot files in the directory.
Resolution
Pre-requirements:
Before following this procedure be sure there are no Snapshots in vSphere - Snapshot manager and/or Unconsolidated Snapshots.


Look for "avvcbimage Info <14677>" in the logs and verify if there are files like "VMNAME-000002-delta.vmdk", "VMNAME-000002-ctk.vmdk" or "VMNAME-000002-sesparse.vmdk".


In this example it was found just "VMNAME-00000X-ctk.vmdk" and "VMNAME-00000X-sesparse.vmdk" files.
 
avvcbimage Info <14677>: All VM file Info:
  File:'VMNAME-000002-ctk.vmdk                         ' last modified on '29-Mar-2020 21:21'  size=3932672
  File:'VMNAME-000002-sesparse.vmdk                    ' last modified on '29-Mar-2020 21:21'  size=256901120
  File:'VMNAME-000002.vmdk                             ' last modified on '29-Mar-2020 21:21'  size=383
  File:'VMNAME-000005-ctk.vmdk                         ' last modified on '31-Mar-2020 20:58'  size=3932672
  File:'VMNAME-000005-sesparse.vmdk                    ' last modified on '31-Mar-2020 20:58'  size=256901120
  File:'VMNAME-000005.vmdk                             ' last modified on '31-Mar-2020 20:58'  size=390
  File:'VMNAME-000006-ctk.vmdk                         ' last modified on '12-Apr-2020 20:46'  size=3932672
  File:'VMNAME-000006-sesparse.vmdk                    ' last modified on '12-Apr-2020 20:46'  size=256901120
  File:'VMNAME-000006.vmdk                             ' last modified on '12-Apr-2020 20:46'  size=390
  File:'VMNAME-766073b0.hlog                           ' last modified on '05-May-2020 19:41'  size=92
  File:'VMNAME-Snapshot24.vmsn                         ' last modified on '29-Mar-2020 21:21'  size=32094
  File:'VMNAME-Snapshot27.vmsn                         ' last modified on '31-Mar-2020 20:57'  size=32094
  File:'VMNAME-Snapshot41.vmsn                         ' last modified on '12-Apr-2020 20:45'  size=32094
  File:'VMNAME-aux.xml                                 ' last modified on '06-Mar-2020 14:25'  size=31322
  File:'VMNAME-ctk.vmdk                                ' last modified on '27-May-2020 17:16'  size=3932672
  File:'VMNAME-e3a0cf52.vswp                           ' last modified on '27-May-2020 17:16'  size=8589934592
  File:'VMNAME-flat.vmdk                               ' last modified on '03-Jun-2020 15:09'  size=64424509440
  File:'VMNAME.nvram                                   ' last modified on '27-May-2020 14:17'  size=8684
  File:'VMNAME.vmdk                                    ' last modified on '27-May-2020 17:16'  size=588
  File:'VMNAME.vmsd                                    ' last modified on '27-Apr-2020 21:27'  size=44
  File:'VMNAME.vmx                                     ' last modified on '27-May-2020 17:16'  size=3515
  File:'VMNAME.vmx.lck                                 ' last modified on '27-May-2020 17:16'  size=0
  File:'VMNAME.vmxf                                    ' last modified on '20-May-2020 15:05'  size=3641
  File:'VMNAME.vmx~                                    ' last modified on '27-May-2020 17:16'  size=3513
  File:'VMNAME_1-000002-ctk.vmdk                       ' last modified on '29-Mar-2020 21:21'  size=1638912
  File:'VMNAME_1-000002-sesparse.vmdk                  ' last modified on '29-Mar-2020 21:21'  size=109051904
  File:'VMNAME_1-000002.vmdk                           ' last modified on '29-Mar-2020 21:21'  size=388
  File:'VMNAME_1-000005-ctk.vmdk                       ' last modified on '31-Mar-2020 20:58'  size=1638912
  File:'VMNAME_1-000005-sesparse.vmdk                  ' last modified on '31-Mar-2020 20:58'  size=109051904
  File:'VMNAME_1-000005.vmdk                           ' last modified on '31-Mar-2020 20:58'  size=395
  File:'VMNAME_1-000006-ctk.vmdk                       ' last modified on '12-Apr-2020 20:46'  size=1638912
  File:'VMNAME_1-000006-sesparse.vmdk                  ' last modified on '12-Apr-2020 20:46'  size=109051904
  File:'VMNAME_1-000006.vmdk                           ' last modified on '12-Apr-2020 20:46'  size=395
  File:'VMNAME_1-ctk.vmdk                              ' last modified on '27-May-2020 17:16'  size=1638912
  File:'VMNAME_1-flat.vmdk                             ' last modified on '03-Jun-2020 15:06'  size=26843545600
  File:'VMNAME_1.vmdk                                  ' last modified on '27-May-2020 17:16'  size=591
  File:'vmmcores-1.gz                                     ' last modified on '06-Mar-2020 14:25'  size=9794545
  File:'vmware-47.log                                     ' last modified on '03-May-2020 17:56'  size=742753
  File:'vmware-48.log                                     ' last modified on '03-May-2020 19:54'  size=245353
  File:'vmware-49.log                                     ' last modified on '05-May-2020 11:28'  size=662114
  File:'vmware-50.log                                     ' last modified on '05-May-2020 19:41'  size=354154
  File:'vmware-51.log                                     ' last modified on '20-May-2020 15:05'  size=410280
  File:'vmware-52.log                                     ' last modified on '27-May-2020 14:18'  size=332087
  File:'vmware.log                                        ' last modified on '02-Jun-2020 14:20'  size=306251
  File:'vmx-VMNAME-3818966866-1.vswp                   ' last modified on '27-May-2020 17:16'  size=90177536
  File:'vmx-zdump.000                                     ' last modified on '06-Mar-2020 14:25'  size=6721536
avvcbimage Info <19704>: DataStore Storage Info:DATASTORENAME01 capacity=2465042792448  free=349293248512


The easiest and fastest way to fix this issue is doing a Datastore vMotion, request  the customer to do it.


After this activity has been done, try a new backup.


If it still fails please verify if the Datastore has changed, looking for "avvcbimage Info <19704>" in the current and previous log:
 
avvcbimage Info <19704>: DataStore Storage Info:DATASTORENAME01 capacity=2465042792448  free=349293248512


Observe after the Datastore vMotion in the log, the file date modification must be updated for all files and the additional used files were cleaned.
 
avvcbimage Info <14677>: All VM file Info:
  File:'TSPEGASUS-682f3bfa.hlog                           ' last modified on '03-Jun-2020 17:38'  size=1336
  File:'TSPEGASUS-aux.xml                                 ' last modified on '03-Jun-2020 17:28'  size=31220
  File:'TSPEGASUS-ctk.vmdk                                ' last modified on '03-Jun-2020 17:39'  size=3932672
  File:'TSPEGASUS-e40ee848.vswp                           ' last modified on '03-Jun-2020 17:28'  size=8589934592
  File:'TSPEGASUS-flat.vmdk                               ' last modified on '03-Jun-2020 17:42'  size=64424509440
  File:'TSPEGASUS.nvram                                   ' last modified on '03-Jun-2020 17:38'  size=8684
  File:'TSPEGASUS.vmdk                                    ' last modified on '03-Jun-2020 17:38'  size=588
  File:'TSPEGASUS.vmsd                                    ' last modified on '03-Jun-2020 17:28'  size=0
  File:'TSPEGASUS.vmx                                     ' last modified on '03-Jun-2020 17:38'  size=7660
  File:'TSPEGASUS.vmx.lck                                 ' last modified on '03-Jun-2020 17:28'  size=0
  File:'TSPEGASUS.vmxf                                    ' last modified on '03-Jun-2020 17:38'  size=47
  File:'TSPEGASUS.vmx~                                    ' last modified on '03-Jun-2020 17:38'  size=7633
  File:'TSPEGASUS_1-ctk.vmdk                              ' last modified on '03-Jun-2020 17:39'  size=1638912
  File:'TSPEGASUS_1-flat.vmdk                             ' last modified on '03-Jun-2020 17:38'  size=26843545600
  File:'TSPEGASUS_1.vmdk                                  ' last modified on '03-Jun-2020 17:42'  size=591
  File:'vmmcores-1.gz                                     ' last modified on '03-Jun-2020 17:28'  size=9794545
  File:'vmware-0.log                                      ' last modified on '03-Jun-2020 17:38'  size=434108
  File:'vmware-48.log                                     ' last modified on '03-Jun-2020 17:28'  size=245353
  File:'vmware-49.log                                     ' last modified on '03-Jun-2020 17:28'  size=662114
  File:'vmware-50.log                                     ' last modified on '03-Jun-2020 17:28'  size=354154
  File:'vmware-51.log                                     ' last modified on '03-Jun-2020 17:28'  size=410280
  File:'vmware-52.log                                     ' last modified on '03-Jun-2020 17:28'  size=332087
  File:'vmware.log                                        ' last modified on '03-Jun-2020 17:39'  size=214834
  File:'vmx-TSPEGASUS-3826182216-1.vswp                   ' last modified on '03-Jun-2020 17:28'  size=90177536
  File:'vmx-zdump.000                                     ' last modified on '03-Jun-2020 17:28'  size=6721536
avvcbimage Info <19704>: DataStore Storage Info:DATASTORENAME02 capacity=2465042792448  free=13296848512


If it still fails, open a support case.


Wednesday, 4 August 2021

Enable Telnet Client in Windows 11 and Server 2022


Telnet is a client/server protocol used for accessing remote servers. As the name might suggest, Telnet was originally used on terminals that only required a keyboard because everything on the screen was displayed in text, usually from a mainframe computer. The terminal used Telnet to remotely log in to a mainframe server or other computer. But in recent years, Telnet has fallen out of favor because it doesn’t provide a secure way to communicate with remote servers.

Nevertheless, Telnet still has its uses today. For example, it can be useful for checking connectivity to a remote server. You can use a Telnet client to try and access a port on a remote server. For example, if you are troubleshooting connectivity issues. Or you can use Telnet to enter some commands and run them on a remote server and the output will be returned in the Telnet client.

You can use Telnet for accessing remote servers if using strong authentication and encryption over the network isn’t critical. One example is connecting to an SMTP server. You might issue some commands to a remote SMTP server to test sending email. The commands below start the Telnet client and then create a connection on SMTP port 25 to a mail server. Then a message is sent before closing the connection. 
 
telnet
set localecho
open mail.contoso.com 25
ehlo contoso.com
mail from: <mahadevtechbytes@contoso.com>
rcpt to: <test@techbytes.com> notify=success,failure
data
subject: test email
This is a test for techbytes.com
.
quit

And while Telnet has never been a critical Windows tool, there is a Telnet client built into Windows 11 and Windows Server 2022, although it isn’t enabled by default. In this article, I will show you how to enable the Telnet client using the GUI and command line.


Install the Telnet client using the GUI

Using the GUI to install the Telnet client in Windows 11 and Windows Server 2022 differs a little. Let’s start with Windows Server 2022.

Install the Telnet client in Windows Server 2022

Follow the instructions below to install the Telnet client using Server Manager.

  1. Log in to Windows Server 2022 with an administrator account.
  2. Open Server Manager from the Start menu.
  1. Click the Manage menu in the top right corner and then select Add Roles and Features.
  1. In the Add Roles and Features Wizard, click Next on the Before you begin
  2. Click Next on the Select installation type
  3. On the Select destination server screen, make sure that your local server is selected in the list of servers and then click Next.
  4. Click Next on the Select server roles
  5. On the Select features screen, scroll down the list of available features, check Telnet Client, and click Next.
  1. Click Install on the Confirmation installation selections
  1. Close the Add Roles and Features Wizard.
Install the Telnet client in Windows 11

The Telnet client is installed using the legacy Control Panel in Windows 11.

  1. Click the Search icon on the taskbar.
  2. Type control panel and then select Control Panel from the list of results under Best match.
  1. In the Control Panel, click Programs.
  1. Click Turn Windows features on or off under Programs and Features.
  1. In the Windows Features window, scroll down the list of available features, check Telnet Client, and then click OK.

The Telnet client will now be installed on Windows 11.

Install the Telnet client using the command line

The Telnet client can be installed using PowerShell or the DISM command-line tool. The following methods work in Windows 11 and Windows Server 2022.

Install the Telnet client using DISM

To install the Telnet client using DISM, following the instructions below.

  1. Open the Start menu on the taskbar.
  2. Type cmd and then make sure that Command Prompt is highlighted in the list of search results.
  1. In the panel on the right, click Run as administrator.
  2. Give consent or provide an administrator username and password as prompted.
  3. In the command prompt window, type the command below and press ENTER.
dism /online /Enable-Feature /FeatureName:TelnetClient
  1. In the command prompt window, type y and press ENTER to restart Windows 11.

Install the Telnet client using PowerShell

To install the Telnet client using PowerShell, following the instructions below.

  1. Open the Start menu on the taskbar.
  2. Type powershell and then make sure that Windows PowerShell is highlighted in the list of search results.
  3. In the panel on the right, click Run as administrator.
  1. Give consent or provide an administrator username and password as prompted.
  2. In the PowerShell window, type the command below and press ENTER.
Enable-WindowsOptionalFeature -Online -FeatureName TelnetClient
  1. In the PowerShell window, type y and press ENTER to restart Windows 11.

And that’s it. The Telnet client is now installed.


Tuesday, 20 July 2021

How to secure Active Directory accounts


Managing service accounts and service account passwords can become overwhelming even in small environments running a large number of Windows Services controlling business-critical applications.

Insecure practices in dealing with service accounts, such as passwords that do not expire and identical passwords, can create security risks. 


Authentication and password security is more important than ever. This tool audit scans your Active Directory and identifies password-related vulnerabilities. The collected information generates multiple interactive reports containing user and password policy information. Specops Password Auditor is a read-only program.

Specops Password Auditor is a great free tool that helps to gain visibility into Active Directory account security issues in the environment. It can help quickly identify accounts, including service accounts, that may have the password set not to expire flag and configured with identical passwords.

Specops Password Auditor scans your Active Directory and detects security related weaknesses, specifically related to password settings. The collected information is used to display multiple interactive reports containing user and password policy information. The reports include a summary of accounts using leaked passwords, comparisons of the password settings in your organization with industry standards and best practices according to multiple official standards.

Specops Password Auditor will only read information from Active Directory, it will not make any changes. It will read the Default Domain Password Policy, any Fine-Grained Password Policies, as well as any Specops Password Policies (if installed).


Note:
To be able to read Fine-Grained Password Policies, and the password hashes for the Breached Password Protection, Identical Passwords or Blank Password reports, you will need domain administrator privileges in Active Directory.

The following user account attributes will also be read:

    pwdLastSet
    userAccountControl
    lastLogonTimestamp 

Reports 

The following is a list of reports you can view/export from Specops Password Auditor tool.

  • Breached Passwords

Use this report to identify user accounts with passwords that are known to be leaked. The accounts in this list should be prompted to change their password.

Note: The Breached Passwords report does not use clear text passwords. The MD4 hashes of the leaked passwords is compared to the hashes of the passwords from the domain. The hashes are not stored, they are read and kept in memory by Specops Password Auditor.

  • Identical Passwords

Use this report to identify groups of user accounts that have the same password. Admin users who use the same password for their normal user accounts and their admin accounts increase their attack surface. The accounts in this list should be prompted to change their password.

  • Blank Passwords

Use this report to identify user accounts with blank passwords. These accounts are affected by a policy without a password requirement.

  • Admin Accounts

Use this report to identify whether admin privileges are used appropriately (granted to users performing tasks that span across Active Directory domains, or activities that require elevated permissions). Delete unnecessary admin accounts and consider a delegated Active Directory security model to follow best practice.

  • Stale Admin Accounts

Use this report to audit unused accounts. Dormant accounts should be deleted as they can be leveraged by attackers to access resources without being noticed.

  • Password Not Required

Use this report to identify user accounts with the control flag for not requiring a password, or those affected by a password policy without a minimum password length. The accounts in this list indicate serious security holes within your organization.

  • Expiring Passwords

Use this report to keep track of password expiration. Anticipating the expiration with a contingency plan can be effective for curbing password reset calls.

  • Password never expires

Use this report to keep track of accounts that have their passwords set to never expire. These can be more vulnerable to attack if the user is reusing this password elsewhere.

  • Expired Passwords

Use this report to identify user accounts with expired passwords. Password that have been expired for an extended period of time can indicate a stale account.

  • Password Policies

Use this report for an overview of your password policies including change interval, dictionary enforcement, as well as relative strength.

            *The following settings are used to determine the maximum strength.

               Minimum length= 16 characters
               At least one of each of the following:
                Lower
                Upper
                Digit
                Special Character

Any policy with as strong, or stronger settings will be displayed as having “maximum” strength.


  • Password Policy Usage

Use this report for a graphical overview of users affected by each password policy.

  • Password Policy Compliance

Use this report to measure your password policies against industry and compliance recommendations. 


Download link - https://specopssoft.com/product/specops-password-auditor/?utm_source=Petri&amp%3Butm_medium=Email&amp%3Butm_campaign=Petri%20SPA%20promo&_hsenc=p2ANqtz-9cOS1s1j1U4NecZ65SxW9zKcT3mu0sbvTtM1rjI9ajG_enrT_f7HRozFZ30-HJqLGlCRAKTaXenr2pua80dHIB7tqiWA


Monday, 5 July 2021

Windows 11: How to Enable the Classic Start Menu

If you prefer the ‘classic’ Windows 10 Start menu, or if you want Live Tiles back, then Windows 11 gives you the option to revert to the Windows 10 Start menu. Microsoft could remove the ability to switch back to the Windows 10 Start menu in Windows 11. But I expect to appease enterprise users, the setting will remain and that it will also be available to configure in Group Policy. At the time of writing, it’s only possible to switch to the classic start menu by adding a value to the registry.


Windows 11 Start menu provides a phone-like experience and cleaner look

But before you rush to change back to the classic Start menu, consider using the new Start menu for a few weeks. In our opinion, it’s a big improvement over the Windows 10 Start menu, which evolved into a bit of a mess. The new Start menu in Windows 11 provides a cleaner experience, disposing of Live Tiles and replacing them with application icons. The app icons can be moved around and arranged as you like, much like you can do on iOS and Android. The icons are arranged in pages, similar to iOS, for a more ‘phone-like’ look and experience.


Live Tiles are no great loss because developers didn’t support them. And even Microsoft’s own applications made limited use of Live Tiles. As there was little interest in the feature, Microsoft never invested further in its development.

The ‘Recommended’ section at the bottom of the new Start menu lets you see docs that you’ve been accessing recently, whether locally or from the cloud. The timeline from Task View is gone in Windows 11, but the ‘Recommended’ section on the new Start menu more than makes up for its removal.

Instead of needing to click three times to power down or put a device to sleep, you just need two clicks on the Windows 11 Start menu. Similarly, to sign out or lock a device also requires just two clicks. ‘All apps’ is now tucked away in the top right corner. But you can still type on the Start menu to search for apps and documents. 


How to Switch back to the classic Windows 10 Start menu

But if you have decided that the new Start menu is not for you, you can add a value to the registry and go back to the Windows 10 experience.

  • Open the Windows 11 Start menu by clicking the Windows key on the taskbar.
  • Type regedit and then click Registry Editor in the search results.
  • Click Yes in the User Account Control dialog to give Registry Editor permission to run.
  • In the Registry Editor application in the left pane, expand HKEY_CURRENT_USER > Software > Microsoft > Windows > CurrentVersion > Explorer > Advanced.

  • Make sure the Advanced key is selected on the right.
  • In the right pane of Registry Editor, right click some white space and select New > DWORD (32-bit) Value.
  • A new value will appear. In the box, type Start_ShowClassicMode.
  • Double click Start_ShowClassicMode.
  • In the Edit DWORD dialog box, type 1 in the Value data field and click OK.
  • Now close the Registry Editor application.
  • Open the Start menu, click your username at the bottom of the menu, and click Sign out.
  • Sign into Windows again with the user account you just signed out from. The registry change is per user, so you need to sign back into Windows using the account where you added the Start_ShowClassicMode registry value.

It may take a minute or so before your user account is switched to the classic Windows 10 Start menu.


If you want to use the Windows 11 Start menu again at any point, just delete the Start_ShowClassicMode value from the registry, sign out, and when you sign back into Windows, you will have a restored Windows 11 Start menu experience.


Windows 11, What's new in Microsoft release first build.


Well wait is over for the Windows fans have been waiting for, the first build of Windows 11 is now available to download. While not every new feature is in this release, there are many that are included – don’t forget to check your device compatibility before downloading the update too.

To get started, Microsoft requires that you join the Insider program as that’s where this first release is being distributed. To get the latest release, you will need to be in the Dev channel but builds will eventually move to the Beta channel.

Microsoft has also indicated that they will eventually release ISOs for direct, clean installs, but that download is not available today.

Here’s what’s new in Build 22000.51 that is now rolling out to Windows Insiders:

Windows 11 Start menu
Windows 11 has a new Start menu design that is centered.


In this release, the new Start menu and centered Taskbar icon experience is included. This is one of the biggest updates to the OS but also feels familiar at the same time.

Windows 11 context menus
Windows 11 context menus now match theme of the OS.


Also included in this release are new context menus that look significantly better than what is available today in Windows 10. You can right-click on the Taskbar to open these items and see the new UI.

Windows 11 action center
Windows 11 action center update with new UI.
 
Microsoft has overhauled the notification center and quick settings in this release. There are the new flyouts with updated designs including rounded corners.
Windows 11 quick settings
Windows 11 quick settings overhauled.


The quick setting controls are easier to understand and have workflows that are more in line with expectations for tapping on icons for toggling the features on and off; easy access sliders provide fine-grained controls for volume and brightness.

Windows 11 file explorer
First look at the new Windows 11 File Explorer


While Microsoft did not show off the new File Explorer at the Windows 11 event, we now have our first look at the updated UI. Featuring a compact ribbon, the UI uses the same icons in Windows 10 21H1 but the interface has been refined.

Windows 11 themes
Windows 11 themes can now be quickly switched.


If you are a fan of themes, then this build is for you; changing themes across the entire UI of Windows 11 is now much easier with a single click.

Windows 11 widgets
Windows 11 widgets let you customize your feed.


Along with the Start menu, Widgets are one of the bigger updates coming to Windows 11 and in this release, Microsoft is pushing out the first iteration of the experience.

The news feed in the widget area will be personalized to your specifications and you can also find weather and traffic information as well.

Windows 11 snap groups
Windows 11 snap groups make it easier to keep apps together.


Snap layouts and Snap groups are new productivity-focused features that make it easier to snap apps to a pre-defined percentage of your display. Snap groups are exactly as the name sounds, it keeps multiple windows snapped together in a group to easily re-launch to a group of applications.

Windows 11 store
The new Windows 11 store will also come to Windows 10.


Microsoft has overhauled the Windows store and in this release, we get our first sample of the updated interface. While the UI is new, this release does not include the ability to install Android apps, which will be coming in a later release.

Windows 11 settings
Windows 11 settings have been overhauled.


The settings panel in Windows 11 has also been overhauled. In this release, we get our first look at the updated UI that features faster “quick action” items, new icons, more whitespace, and overall, a theme that matches the rest of Windows 11.

Windows 11 settings
Windows 11 settings make it faster to do common tasks.


As an example, Bluetooth settings have been updated to make it much easier to connect or disconnect a device from your PC.

Settings
Updated Windows 11 settings makes connecting/disconnecting easier.


Another good example is the network connectivity toggles. The layout of all your connection settings is easier to see in one view and displayed in a way that should make connecting or unplugging from the Internet easier.

One other feature coming to Windows for the first time with this release is support for Wi-Fi 6E. This new connectivity standard opens up more bandwidth for connections in your home (or workplace) and is now supported natively in Windows 11.

These are the major updates that are coming to the first build of Windows 11 that is now available. You can download the update via Windows update if you are an Insider but you should not install this release on a device used in a production environment. Also make sure to keep an eye on the Known Issues log as it’s quite extensive.


Monday, 28 June 2021

How to Enable TPM for Windows 11 and Solve Compatibility Issues


Microsoft has officially announced Windows 11 and with it comes a new UI, a new servicing model, and a strict new requirement for the minimum specs that are required to run the OS. In this post, We will help you understand the steps you can take today to make sure your computer is ready for the OS when it ships later this year.

At the foundation of Windows 11, there are two major changes that are impacting users and Microsoft has a Windows 11 tool that can help you understand any blockers on your specific device – you can download the tool here.

Microsoft provides the following hardware guidance for Windows 11:

  • Windows 11 Spec Requirements:
  • Processor: 1 gigahertz (GHz) or faster with 2 or more cores on a compatible 64-bit processor or System on a Chip (SoC)
  • RAM: 4 gigabyte (GB)
  • Storage: 64 GB or larger storage device
  • System firmware: Trusted Platform Module (TPM) version 2.0
  • Graphics card: Compatible with DirectX 12 or later with WDDM 2.0 driver
  • S mode is only supported on Home edition of Windows 11. If you are running a different edition of Windows in S mode, you will need to first switch out of S mode prior to upgrading. 

Configuring TPM

Starting with the TPM scenario. The reality here is that for most users, this will not be a problem (as long as you have a newer CPU). But where many people are running into problems is that their TPM is not enabled or needs to be configured.

The first step you should follow is:

  • Hit your Windows key on your keyboard
  • Type Run
  • Type tpm.msc

This will open up the TPM tool on Windows and will let you know if your device has the module installed and operational. If your machine tells you it is not installed, continue below, if you do have it installed, jump down to the supported CPU section.

Windows 11 TPM screen
The Windows TPM tool can help you determine if your device will run Windows 11.

If your device was built by an OEM (original equipment manufacturer) or you built it yourself in the past couple of years, it likely has a TPM chip but it is not enabled. The good news is that you can enable it but the bad news is that that instruction will be specific to your hardware.

Meaning, you should try to find the instruction manual for your motherboard but if you don’t know where that is, there are still a few steps you can take to enable to feature:

  • Restart your desktop/laptop
  • Look for the on-screen command to enter your bios (usually F2/Del/F12)
  • Look for a security tab (or it may be under Advanced CPU configuration)
  • Look for a listing of TPM, Intel Platform Trust Tech (IPTT), AMD CPU fTPM, or PCH-FW
  • Toggle the setting to Enabled
  • Save (F10 or similar keystroke)
  • Exit the BIOS and your machine will reboot.

If your machine does not have any of these options, this does not mean you have to buy new hardware (yet). If you built your own PC, there is a good chance your motherboard supports TPM modules but the manufacture did not include one – you can buy one online and attach it to your motherboard.

But before you do that, you will need to investigate if your motherboard has the correct header to attach the TPM module (look in your instruction manual to see if this is an option). Also, keep in mind that you may need to purchase a specific TPM module for your board.


Processor Compatibility

The bigger change that is going to leave a lot of people behind on Windows 10 is processor compatibility. The TPM configuration noted above, while annoying, is an easy fix as all newer processors have this functionality baked in since roughly 2016. But Microsoft has made a decision, that they have yet to fully explain why it is recommended to need an 8th generation Intel chip or newer to run the OS.

Befuddling, Microsoft is currently selling the Surface Studio 2 with a starting price at $3500 and it does not support Windows 11. The device has a 7th generation Intel chip which means it is not officially supported or recommended that you run Windows 11.

To determine what CPU your device has installed

  • Hit the Windows Key
  • Type “About My PC”
  • Hit Enter

Windows will open a settings page that will list your system specs and in that list, you will see your CPU. Unfortunately, it doesn’t say the generation which means you will need to search for the specific generation. As a broad Intel guide, for i5 chip, unsupported models would be an i5-7200 and below, and for i7, it would be an i7-7700 and below – this is a broad guide and you should search your own CPU to find the exact generation.

Windows 11 About PC Screen

You can find the official list of Intel chips supported in Windows 11, here.

On the AMD side, Microsoft says that you will need a Ryzen 3400G or better. As with the Intel chips, you will need to do your own research to determine if your chip is supported but if it’s less than a couple of years old, you should be able to run Windows 11 but if it’s older than 4 years, you may be looking at new hardware.

You can find the official list of AMD chips supported in Windows 11, here.


Additional Information

Microsoft’s ‘line in the sand’ for CPUs isn’t clear cut as older Intel chips, dating back to Intel 6th gen, have support for TPM 2.0 which meets the security requirement and the core requirement. More annoyingly, chips like the Intel 7700K are more than capable of running Windows 11 and running it well but are left out of Windows 11 for reasons the company has not shared.

This is the first significant update to Windows spec requirements in many years and it’s causing confusion with consumers. Only time will tell if Microsoft relaxes requirements on supported chips or if they are going to stand firm with the initial compatibility list.


Windows 10 Features Won't be in Windows 11


With the release of Windows 11, Microsoft is taking the opportunity to prune Windows 10 of some features that were not used or are not applicable with the new OS. Starting this fall when the OS is released, the company is cutting several features that IT Pros will likely need to educate or be aware of, before migrating users.

On the positive side of the cutting floor, Cortana has been removed from the setup experience. No more Cortana screaming at you about signing in or adding WiFi during the setup process. News and Interests, which was a late addition to Windows 10 is also going away, some may see this as a positive, but it is being replaced by widgets in Windows 11.


On the other side of the coin, Windows 10 S mode will only be available in the Home edition of Windows 11. Meaning, if you were using S functionality, with Windows 11, that’s no longer an option in a corporate environment.

Windows 11 will introduce a new Start menu which means big changes are coming to your old content in your Windows 10 Start menu. Microsoft says that named groups and folders of apps are no longer supported and the layout is not currently resizable and pinned apps and sites will not migrate.

It’s the second point of depreciation that is important: if you have users who only know how to get to a site via it being pinned, time to move to browser bookmarks.

For the taskbar, if you have any users that place the taskbar on the side or at the top of the screen, that functionality is going away. Moving forward, you can put the taskbar anywhere you want as long as it’s at the bottom of the screen.

For everything else to make sure it won’t impact your users when upgrade, you can find the entire list of items not moving to Windows 10 below.

  • Cortana will no longer be included in the first boot experience or pinned to the Taskbar.
  • Desktop wallpaper cannot be roamed to or from device when signed in with a Microsoft account.
  • Internet Explorer is disabled. Microsoft Edge is the recommended replacement and includes IE Mode which may be useful in certain scenarios.
  • Math Input Panel is removed. Math Recognizer will install on demand and includes the math input control and recognizer. Math inking in apps like One-note are not impacted by this change.
  • News & Interests has evolved. New functionality has been added which can be found by clicking the Widgets icon on the Taskbar.
  • Quick Status from the Lock screen and associated settings are removed.
  • S Mode is only available now for Windows 11 Home edition.
  • Snipping Tool continues to be available but the old design and functionality in the Windows 10 version has been replaced with those of the app previously known as Snip & Sketch.
  • Start is significantly changed in Windows 11 including the following key deprecation's and removals:
    • Named groups and folders of apps are no longer supported and the layout is not currently resizable.
    • Pinned apps and sites will not migrate when upgrading from Windows 10.
    • Live Tiles are no longer available. For glanceable, dynamic content, see the new Widgets feature.
  • Tablet Mode is removed and new functionality and capability is included for keyboard attach and detach postures.
  • Taskbar functionality is changed including:
    • People is no longer present on the Taskbar.
    • Some icons may no longer appear in the System Tray (systray) for upgraded devices including previous customization's.
    • Alignment to the bottom of the screen is the only location allowed.
    • Apps can no longer customize areas of the Taskbar.
  • Timeline is removed. Some similar functionality is available in Microsoft Edge.
  • Touch Keyboard will no longer dock and undock keyboard layouts on screen sizes 18 inches and larger.
  • Wallet is removed.
  • The following apps will not be removed on upgrade but will no longer be installed on new devices or when clean-installing Windows 11. They are available for download from the Store:
    • 3D Viewer
    • OneNote for Windows 10
    • Paint 3D
    • Skype

If you are wondering why Microsoft is removing Skype from Windows 11, that’s because they are going to bake Teams into the OS experience. This means that everyone who is using Windows 11 Home, will also now be using Teams.


Featured post

Top 10 Rare Windows Shortcuts to Supercharge Productivity

  Windows Key + X, U, U: This sequence quickly shuts down your computer. It's a great way to initiate a safe and swift shutdown without...