Monday, 5 October 2020

Understanding the PowerShell Error Variable

Figure1 - Terminating Error Output

As with any programming language, code will have errors and troubleshooting those problems can be difficult. Thankfully, PowerShell has a rich error object and several powerful tools to help debug your code.

With PowerShell , these tools become even more useful and error handling even easier. As the language evolves and becomes used in more places than ever, being able to quickly and efficiently troubleshoot a problem will prove invaluable to integrating the language into common workflows.

Terminating Errors

As you can see below, the text “This should never be shown” is not shown, as the terminating error stops code execution. The function throw will always return a terminating error.

Non-Terminating Errors

It is more difficult to arbitrarily generate a non-terminating error, but one easy way is to use the Get-ChildItem cmdlet and ask the cmdlet to find a nonexistent directory. As you can tell the command Write-Host "This text will show!", does in fact appear.

 
    Figure2 - Non-Terminating Error Output


You can turn most non-terminating errors into terminating errors by modifying an individual cmdlet’s ErrorAction to Stop. For example, Get-ChildItem "missing_dir" -ErrorAction 'Stop'

Error Views

You might notice that in the previous output, there are two different views of the error information. Figure 1 shows the NormalView of the $ErrorView preference variable. This view was standard and traditional until PowerShell . Starting with PowerShell , the default view has changed to what you see in Figure 2 and that is of the ConciseView. It dispenses with much of the decoration around the output, but as you might be able to tell, some information is not made available.
 

The Error Object Behind the Scenes

Underlying the data behind the error output is the $Error object that is populated by PowerShell when errors are thrown. To view this data, you are able to output and walk through the information. The traditional way to get the last error thrown is by calling $Error[0]. This uses array notation to reference the error.


         Figure4 - $Error Object

If you happen to mistype this command, you will overwrite the first object in the error collection with the new error, so be careful when referencing this object.

As you can see there is the same error as originally shown, but we want to view more of the data. By selecting all of the properties, we are able to see what’s available. As we will talk about in the next section, the Get-Error cmdlet provides a rich view of this data, but it’s important to understand what is going on underneath.

            Figure 5 – Error Object Properties

By walking through each property we can see what information exists between the Get-Error cmdlet and the $Error object itself.

    Figure 6 – Error Object Exception Properties

The New Get-Error Cmdlet

That brings us to the next PowerShell  addition and that is the Get-Error cmdlet. To expand upon the ConciseView and show far more detail, we can run the Get-Error cmdlet and see the expanded details of the last error thrown.

    Figure 3 – Get-Error Output

There is a lot of information shown here, so let’s break down what is useful.
 

Exception

  • Type – Basic Exception Information
  • ErrorRecordMost of this information is from the $Error object itself. The TargetObject, CategoryInfo, and FullyQualifiedErrorId are all duplicated further in the Get-Error output. What is useful is the Exception data.
    • Type – An exception, but could be referencing the parent exception
    • Message – The human-readable error message
    • HResult – Traditional numerical error code that Windows has used since the early days of the operating system
  • ItemName – The same as the TargetObject shown later in the Get-Error output
  • SessionStateCategory – A series of values that errors fall into, this is an enum underneath
  • TargetSite – A set of information that exposes some of the internal PowerShell engine values and where the error itself is coming from
  • StackTrace – This is the actual method signature of where the error itself came from and can help aid in why an error was shown
  • Message – The human-readable error message
  • Source – This is the source of where the error is coming from
  • HResult – As discussed above, the traditional numerical error code from Windows


TargetObject

The object that the function, cmdlet, or code targets, in this case D:\\missing_dir


CategoryInfo

A concatenated view of several different properties, breaking down to the below format:
<Error>: (<TargetObject>:<ObjectType>) [<Originating CmdLet>], <Exception Type>


FullyQualifiedErrorId

The FullyQualifiedErrorId is Message property of the exception object combined with the fully-qualified name of the class where the exception originated.


InvocationInfo

  • MyCommand – The originating cmdlet or function throwing the error
  • ScriptLineNumber – Location within the file or ScriptBlock that the error is thrown
  • OffsetInLine – The location within the line that the error was thrown
  • HistoryId – The location from within the Get-History cmdlet that the error was thrown
  • Line – The command throwing the error
  • PositionMessage – Combined information for the error
  • InvocationName – The cmdlet or function throwing the error
  • CommandOrigin – In what context the error was thrown


ScriptStackTrace

Contained here is information on where in a script the error occurred. In this case, the error occurred on line 1, but this will reflect the line of the error in the given ScriptBlock.


Conclusion

Unlike other programming languages, PowerShell provides a very rich error object to figure out what went wrong and help to debug troublesome code. With PowerShell, the ability to decipher errors is even easier with the introduction of the Get-Error cmdlet. Furthermore, the ConciseView of the ErrorAction preference will keep the command line free from clutter and make coding even easier!
 

Monday, 21 September 2020

Powershell Scrip to Run SCCM Action under Configuration Manager Properties


Run the following script in powershell to run the Action items.


Function Run-SCCMClientAction {
        [CmdletBinding()]
               
        # Parameters used in this function
        param
        (
            [Parameter(Position=0, Mandatory = $True, HelpMessage="Provide server names", ValueFromPipeline = $true)]
            [string[]]$Computername,

           [ValidateSet('MachinePolicy',
                        'DiscoveryData',
                        'ComplianceEvaluation',
                        'AppDeployment', 
                        'HardwareInventory',
                        'UpdateDeployment',
                        'UpdateScan',
                        'SoftwareInventory')]
            [string[]]$ClientAction
  
        )
        $ActionResults = @()
        Try {
                $ActionResults = Invoke-Command -ComputerName $Computername {param([string[]]$ClientAction)

                        Foreach ($Item in $ClientAction) {
                            $Object = @{} | select "Action name",Status
                            Try{
                                $ScheduleIDMappings = @{
                                    'MachinePolicy'        = '{00000000-0000-0000-0000-000000000021}';
                                    'DiscoveryData'        = '{00000000-0000-0000-0000-000000000003}';
                                    'ComplianceEvaluation' = '{00000000-0000-0000-0000-000000000071}';
                                    'AppDeployment'        = '{00000000-0000-0000-0000-000000000121}';
                                    'HardwareInventory'    = '{00000000-0000-0000-0000-000000000001}';
                                    'UpdateDeployment'     = '{00000000-0000-0000-0000-000000000108}';
                                    'UpdateScan'           = '{00000000-0000-0000-0000-000000000113}';
                                    'SoftwareInventory'    = '{00000000-0000-0000-0000-000000000002}';
                                }
                                $ScheduleID = $ScheduleIDMappings[$item]
                                Write-Verbose "Processing $Item - $ScheduleID"
                                [void]([wmiclass] "root\ccm:SMS_Client").TriggerSchedule($ScheduleID);
                                $Status = "Success"
                                Write-Verbose "Operation status - $status"
                            }
                            Catch{
                                $Status = "Failed"
                                Write-Verbose "Operation status - $status"
                            }
                            $Object."Action name" = $item
                            $Object.Status = $Status
                            $Object
                        }

            } -ArgumentList (,$ClientAction) -ErrorAction Stop | Select-Object @{n='ServerName';e={$_.pscomputername}},"Action name",Status
        } 
        Catch{
            Write-Error $_.Exception.Message
        }  
        Return $ActionResults          
 }   
 Run-SCCMClientAction -ComputerName localhost -ClientAction MachinePolicy,DiscoveryData,ComplianceEvaluation,AppDeployment,HardwareInventory,UpdateDeployment,UpdateScan,SoftwareInventory

PowerShell Basics: How to Force AzureAD Connect to Sync


In every organization, the possibility of role changes or change of contact information can occur quite frequently. AzureAD Connect is a great tool that allows administrators to make said updates either on-premises or in cloud and will sync all changes accordingly. It can take up to 30 minutes for Azure Active Directory to update these changes when these changes are applied on the on-premises Active Directory instance and vice-versa via AzureAD Connect. It can also take up to an additional 30 minutes to then sync changes with Office 365. This post will detail steps to force AzureAD Connect to sync on command when required via PowerShell to combat the delay.


Lets begin.


  1. Run PowerShell
     
    How_To_Unlock_A_User_In_Active_Directory_via_PowerShell_001.pngRun PowerShell
     
  2. Run the following command to install the AzureAD Sync module:
     
    Import-Module ADSync
  3. Next lets review the current intervals AzureAD Connect uses to sync by running the following command.
     
    Get-ADSyncScheduler
    NOTE: The report should show intervals of 30 minute syncs and a sync policy type of Delta. A sync policy type of Initial is usually shown after AzureAD Connect's initial sync but can also be forced as detailed in the next step.
     
  4. Now run the following command to initialize the AzureAD Sync immediately.
     
    Start-ADSyncSyncCycle -PolicyType Delta


Thursday, 17 September 2020

Domain Controller Selection


The process of a Windows client selecting an Active Directory domain controller isn't too complex but is often not fully understood.  Let's look at the way a member server chooses a DC and how this affects applications.


Why it Matters

Windows will optimize connections to the best available domain controller for the following types of situations:
  • Authentication for users logging directly into the server
  • Authentication for users accessing the applications on the server (such as SharePoint or Exchange)
  • Group policy processing for user accounts and the computer account
  • Promotion of a member server to a DC
For each of these, it is clearly important to try to use a DC that is local to the member server.  For example, you wouldn't want thousands of Exchange authentications to be sent to a DC across the country if a local one is available.


How it Works

When a member server or workstation needs to find a domain controller, it goes through the following steps:
  1. Query the primary DNS server for the all domain controller SRV records in the domain (These have the format of "_ldap._tcp.mydomain.local")
    1. This will return an entry for each DC in the domain.  For example, this screenshot shows the lookup result for a domain with 2 DCs, named MGLABDC4 and MGLABDC5:
      dc-selection-1.jpg
  2. Select the first DC in DNS result list and connect to it via LDAP
  3. Determine if the chosen DC is in the same site as the member server, based on the information configured in AD Sites & Services
    1. If so, the member server begins using that DC for communications
    2. If not, the DC tells member server what site it is in
      1. Member server sends new DNS query for the list of DCs specifically in its own site
      2. Member server selects the first DC in DNS result list and connects to it via LDAP
      3. If no DC in the local site is available, connect to any DC in the domain
  4. Cache the name of the local site in the registry to speed up future operations
If the client attempts to contact a DC that's offline, it will try to contact the next one in the list until all results are exhausted.

Here is a screenshot from a member server showing how the server is preferring the DC in its local site.


A common misconception is that Windows clients will use their configured DNS servers as their primary DCs.  As you can see by the above process, this is not the case.  The member server will query its configured DNS server to retrieve a list of DCs and then intelligently choose the correct DC based on the site information.


Commands to Help

To help view and diagnose how a member server is locating its DC, try the following commands

echo %logonserver% - This shows the DC that was used to authenticate and log in the current user


nltest /dsgetsite - This shows the AD site that the current server has detected that it's in


nltest /dclist: (include the colon at the end) - This shows the list of DCs in the current domain, including which site each is in.  In this example, MGLABDC4 is in the MG-AZ-EASTUS site, and MGLABDC5 is in the MG-AZ-EASTUS2 site.


nslookup -type=srv _ldap._tcp.mydomain.local. - This will query the primary DNS server for all domain controller SRV records.  This should return all of the DCs in the domain.  In this example, MGLABDC4 and MGLABDC5 are returned.


nslookup -type=srv _ldap._tcp.mysitename._sites.dc._msdcs.mydomain.local. - This will query the primary DNS server for domain controllers that are registered in "mysitename".  In this example, only MGLABDC4 is in the site that was queried, which matches the information we found with nltest /dclist: previously.


Configuration

How do you ensure that all of this happens smoothly?  The single most important thing to check is that AD Sites & Services is configured correctly.  You should review and confirm the following points:
  • All of the LAN subnets in the corporate network are defined in AD Sites & Services
  • Each of those subnets is configured for the correct AD Site
  • Each site with a significant number of clients has a local DC to authenticate with
If the Windows client's IP address doesn't match to a subnet defined in the AD configuration, it has no way of finding a the closest DC.  That can lead to unoptimized connections and slower logons and AD operations.

Monday, 7 September 2020

How to point a client to different Domain Controller


When a logon request is made to a domain, the workstation sends out a request to find a domain controller for the domain. The domain name is actually a NetBIOS name that is a 16-character name with the 16th character used by Microsoft networking services to identify the NetBIOS type.

For some reason some clients are not working as expected or working slower and you want to point client to different domain controller. To find out if any of the domain controllers is having problems you can quickly change the domain controller that the affected client is using.

Back in the day when Windows NT 4 ruled the world there was a command called setprfdc (set preferred domain controller) nltest does something similar.

So first we wanted to find out what DC the client is using. Now there are many different ways but here is a command that generally used:

nltest /dsgetdc:domain.local


The output was:

DC: \\DC1.DOMAIN.local
Address: \\10.111.1.200
Dom Guid: xxxxxxxx-xxxx-xxxx-xxxx-xxxxxxxxxxxx
Dom Name: DOMAIN.local
Forest Name: DOMAIN.local
Dc Site Name: Default-First-Site-Name
Our Site Name: Interxion
Flags: PDC GC DS LDAP KDC TIMESERV WRITABLE DNS_DC DNS_DOMAIN DNS_FOREST
The command completed successfully.


This means that the client is using DC1. Now we wanted quickly to point the client to a different domain controller DC2. To do that write the following command:

nltest /Server:client0 /SC_RESET:domain.local\dc2

The output was:  

Flags: 30 HAS_IP  HAS_TIMESERVTrusted DC Name \\DC1.DOMAIN.local
Trusted DC Connection Status Status = 0 0x0 NERR_Success
The command completed successfully


 If you run the first command again you should see that domain controller has changed.

Thursday, 20 August 2020

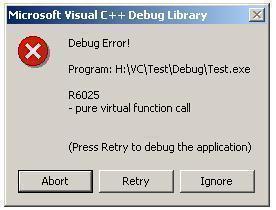
How to Fix Runtime Error R6025


Even though the Microsoft Windows operating system (OS) is one of the most used in the world, computer users may encounter the Runtime Error R6025. The error results from a program or application becoming corrupted. After the error is thrown, the application causing the problem must be deleted and reinstalled in order to clear the error from the Windows OS.

How to Fix Runtime Error R6025

Step 1 – Exit the program that triggered the R6205 runtime error by clicking the “X” in the upper right hand corner or clicking the “File” and “Exit” menu options.

Step 2 – Open the Windows Task Manager by clicking the “Ctrl” + “Alt” + “Delete” keys simultaneously. Choose the “Start Task Manager” menu choice on the subsequently displayed menu.

Step 3 – Click the “Processes” menu tab and choose the “Image Name” menu button.

Step 4 – Verify that the program that threw the Runtime Error R6025 is not listed on the listing of programs. If the application is running, click the name and choose the “End Process” menu button.

Step 5 – Choose the “Start” menu button and click the “Control Panel” menu option. In Windows XP, choose “Settings” and “Control Panel” to access the Windows Control Panel.

Step 6 – Select the “Programs and Features” icon or the “Add/Remove Programs” menu option depending on the version of Windows installed on the computer.

Step 7 – Select the “Remove Program” menu option underneath the application that triggered the Runtime Error R6025 and follow the default menu prompts to delete the program.

Step 8 – Exit the Windows Control Panel then click the “Start” menu.

Step 9 – Enter “Cleanmgr” in the Search text field then press the “Enter” key.

Step 10 – Select the “C” drive and allow the program to clean the files on the computer’s hard drive.

Step 11 – Restart the computer after disk clean-up is complete and reinstall the application that was triggering the R6205 runtime error.

Monday, 10 August 2020

Error Number 0x80072ee2


The Microsoft Corporation has designed the Windows Operating System (OS) to query the Microsoft Update web site on recurring intervals in order to check for and install required updates on your computer. If your computer experiences difficulty in connecting to the Windows Update server, then it can result in throwing error number 0x80072ee2 on your computer and will prevent you from updating the computer until the error clears.

What Other Error Codes Are Associated With the Windows Update Server?

Error 0x80072ee2 is not the only error code that is associated with a failure to connect with the Windows Update server. Other errors that may be associated with your computer failing to connect with the update server are: Error 0x80070008, Error 0x800705B4, Error 0x8007000E, Error 0x80072EFD, Error 0x80072EE7, Error 0x80072EEF, Error 0x80072EFE, Error 0x8024400E, Error 0x80072F76, Error 0x80244016, Error 0x80072F78, Error 0x80244022, Error 0x80090305, Error 0x8024402F, Error 0x8009033F, Error 0xC80003FA, Error 0x80244008, Error 0xC800042D, Error 0x8024400A, Error 0x80071A90, and Error 0x8024400D. The majority of these errors are thrown due to temporary issues that are associated with high network traffic or an outage at the Windows Update Server. Before proceeding with troubleshooting the error, you should wait 15-30 minutes and attempt to start the Windows Update application to check for updates.

Steps to Fix Error Number 0x80072ee2


Step 1 – Wait approximately 30 minutes and attempt to run Windows Live Update again. This will fix the error in the majority of cases that are caused by problems on the Microsoft Server due to high Internet traffic or other server-side problems.

Step 2 – Disable any third-party firewall programs that are installed and running on your computer. Most third-party firewall programs will let you do this by opening the respective control or configuration panel for the application and selecting the appropriate “disable” menu option. You will want to turn on the Windows Firewall (if not running already) to ensure that your computer has some level of protection while your regular firewall is disabled. To turn on the Windows Firewall: select the “Start” and “Control Panel menu options. Then, choose the “System and Security” menu choice followed by clicking the “Windows Firewall” menu option. Toggle the “On/Off” menu switch to the “On” position and enter the admin password for the computer (if prompted).

Step 3 – If the Update Server continues to fail to connect, temporarily disable any third-party antivirus programs that are on you computer. To disable these programs, open the respective control or configuration panel for the program and select the “Disable Virus Protection” or equivalent menu option. Attempt to run Windows Update and the error should be corrected. If this solves the problem, ensure you turn your antivirus protection back to the “On” state to keep your computer protected form computer malware.

Step 4– Add the Windows and Microsoft update sites to the “Trusted Sites” list in Internet Explorer. With Internet Explorer open, choose the “Tools” and “Internet Options” menu choices. Then, select the “Security” menu tab and choose the “Trusted Sites” option. Under “Sites” select the option to clear the “require server verification(https:) for all sites” check box. Then, enter the following sites in the “Add this Web site to the zone box”: update.microsoft.com and windowsupdate.microsoft.com and select the “Ok” button. Then, run the Windows Update application again to correct the error.

Featured post

Top 10 Rare Windows Shortcuts to Supercharge Productivity

  Windows Key + X, U, U: This sequence quickly shuts down your computer. It's a great way to initiate a safe and swift shutdown without...